I H8 ISPs - And I have the solution!
tags: technology, selfhosted, projectsI don’t like ISPs.
For years residents of the UK have been getting fucked by internet service providers (ISPs), from extortionate pricing (10mbps down for £60 a month, what the hell BT X3), sketchy business practices, selling of user search data, internet censorship, making moving home more difficult and so much more, its safe to say I am not a giant fan off them as a whole ^^'
But we need access to the internet, so what can we really do about it…?
Is Mobile data a viable alternative?
In the UK a no restrictions unlimited data mobile sim can be found for about 20 bones (Always ensure that they have no form of soft cap before buying!) which is a good price compared to many ISPs. And most towns or cities, assuming your not on the 02 network, have good coverage and usable speeds.
Lets cover the advantages and disadvantages of using mobile data under the assumption we would use a mobile hotspot from our phones.
Advantages and disadvantages:
What advantages are there to using a data provider?
- There is far more options in who you chose to go with, meaning your less likely to have a situation where BT (or any other ISP) is the only internet provider in your area and is therefore able charge you huge amounts of money for the legal minimum connection speed a house must have.
- You would be able to move your access point from place to place with ease.
- As stated before ~£20 per month for unlimited bandwidth is very competitive with ISPs where often the same price nets you a data cap or even slower speeds.
What disadvantages are there to using a data provider?
- It relies on you being within reasonable distance to a cell tower and having a spare phone with decent cellular hardware, which is not always the case.
- Latency - Compared to a cabled connection latency can often fluctuate more and be slower.
- Phones do not make great routers! - They have many major flaws such as missing crucial router settings, low Wi-fi range, bottle-necking quickly, etc.
- By default this offers no better privacy or internet freedom as data providers also track and sensor what you look at on the internet.
While the first 2 disadvantages are case by case dependant, the second 2 are more than fixable…
The plan:
While there are benefits to using a mobile data hotspot, its clear that just popping a sim into a mobile phone, connecting to a cell network and making a hotspot still leaves many of the same issues I have with ISPs.
As such I plan to use a spare mobile phone to connect to a cell tower and act as a gateway for the network in tandem with a raspberry pi (a small and cheap computer) to act as the router, running some special software to fix the privacy/censorship issues ;3 (its worth noting that a dedicated cellular hat could be used with the Pi instead of tethering with a mobile phone, however they are quite pricey, making reusing an old phone a more accessible option for most people)
Requirements
- A spare phone with relatively modern mobile standards i.e (4g LTE, 5g, etc.) or a cellular pi hat.
- A usb to usbc cable.
- A raspberry Pi 4/5, any variant should work.
- (recommended) A good Wi-Fi dongle or wireless nic hat that works with Pi OS, I wont be covering this in this blog but you can find more info here and around their docs.
- (optional) Dedicated Access Point or router in “AP mode”.
- (optional) A power bank, if you want to make the setup fully portable.
Network Diagram
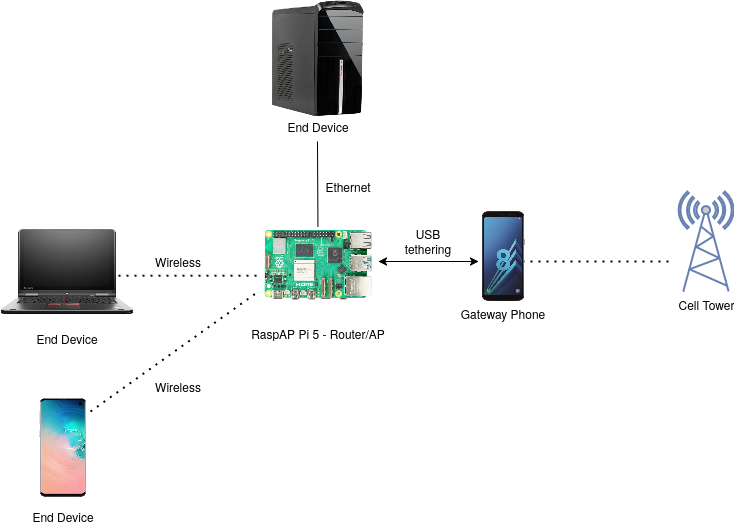
What is USB Tethering?
It is a feature on nearly all android phones released in the last decade that allows the phones network connection to be shared to another device via a USB cable, in this case we tether to the Pi5 so it can have access to the internet via mobile data to allow it to serve internet to the clients.
What is RaspAP and why use it?
RaspAP is a piece of software designed to run on a raspberry pi that is able to turn it into a fully functional router/Access point with no major draw backs. It is incredibly feature rich, and importantly for this project, has great VPN support allowing us to tunnel all traffic on the network through the privacy focused Mullvad VPN, which will completely prevent any providers from seeing what is being accessed on the network and also stop them from censoring it.
Real world use-cases for this
Before we continue with the practical setup of this lets briefly cover actual reasons to do this:
- Escaping ISP hell - Being tied of ISPs is more than a valid enough excuse c:
- Needing a portable router - This project is perfect for anyone who is always on the move.
- When Living in a temporary location.
- If you have high internet prices in your area.
- To avoid ISPs tracking and logging.
- Having a slow internet line.
- If living in a shared apartment/student accommodation - these networks can be unsafe, strictly monitored or plain slow - its worth noting that in this case it may be better to connect to the available router with the pi over Ethernet rather than mobile data.
- When staying at hotels or holiday resorts so you can stay connected without being tracked.
Setup:
Installing Pi OS lite
I selected my device model, operating system and SD card within the Pi Imager as follows:
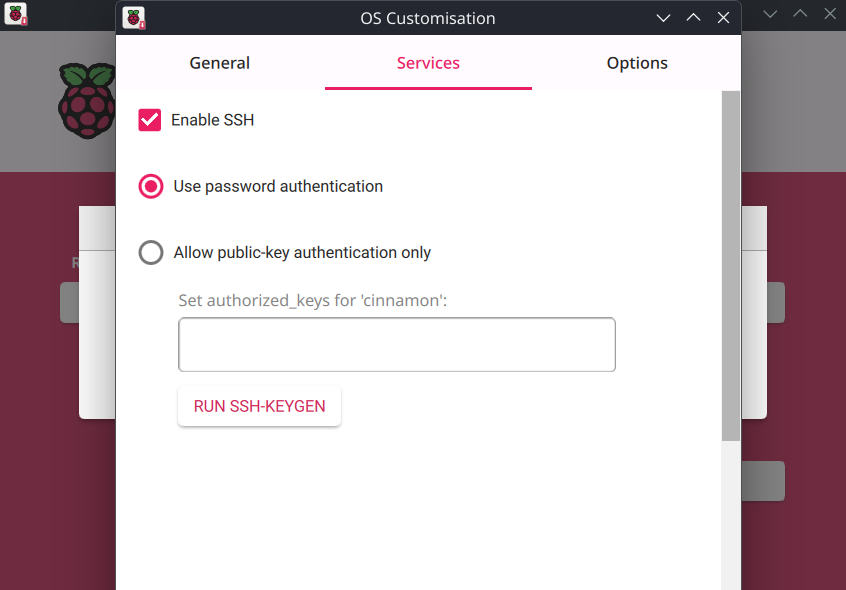
 I then clicked next and configured the OS settings with GB localisation and SSH enabled as well as adding login credentials:
 I then applied the settings and burnt it to the Pi SD card.
Installing RaspAP
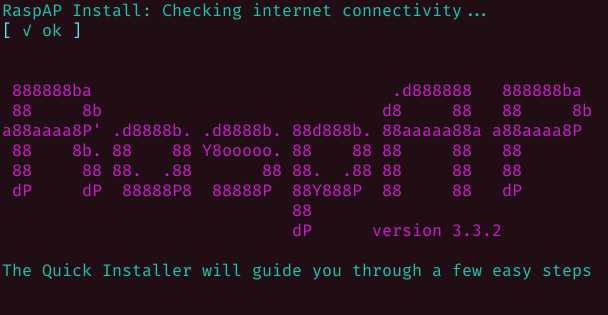
I ssh’d into the Pi and followed the quick start guide “quick installer” section. Along the way I accepted all recommended prompts and also:
- “Install OpenVPN and enable client configuration?”
- “Install WireGuard and enable VPN tunnel configuration?”
Post install poke
Once installed I logged into the RaspAP wireless network with the default credentials (these can be found in the “Inital settings” section of the quick start) and entered the IP of the AP into my browser to access the webgui:
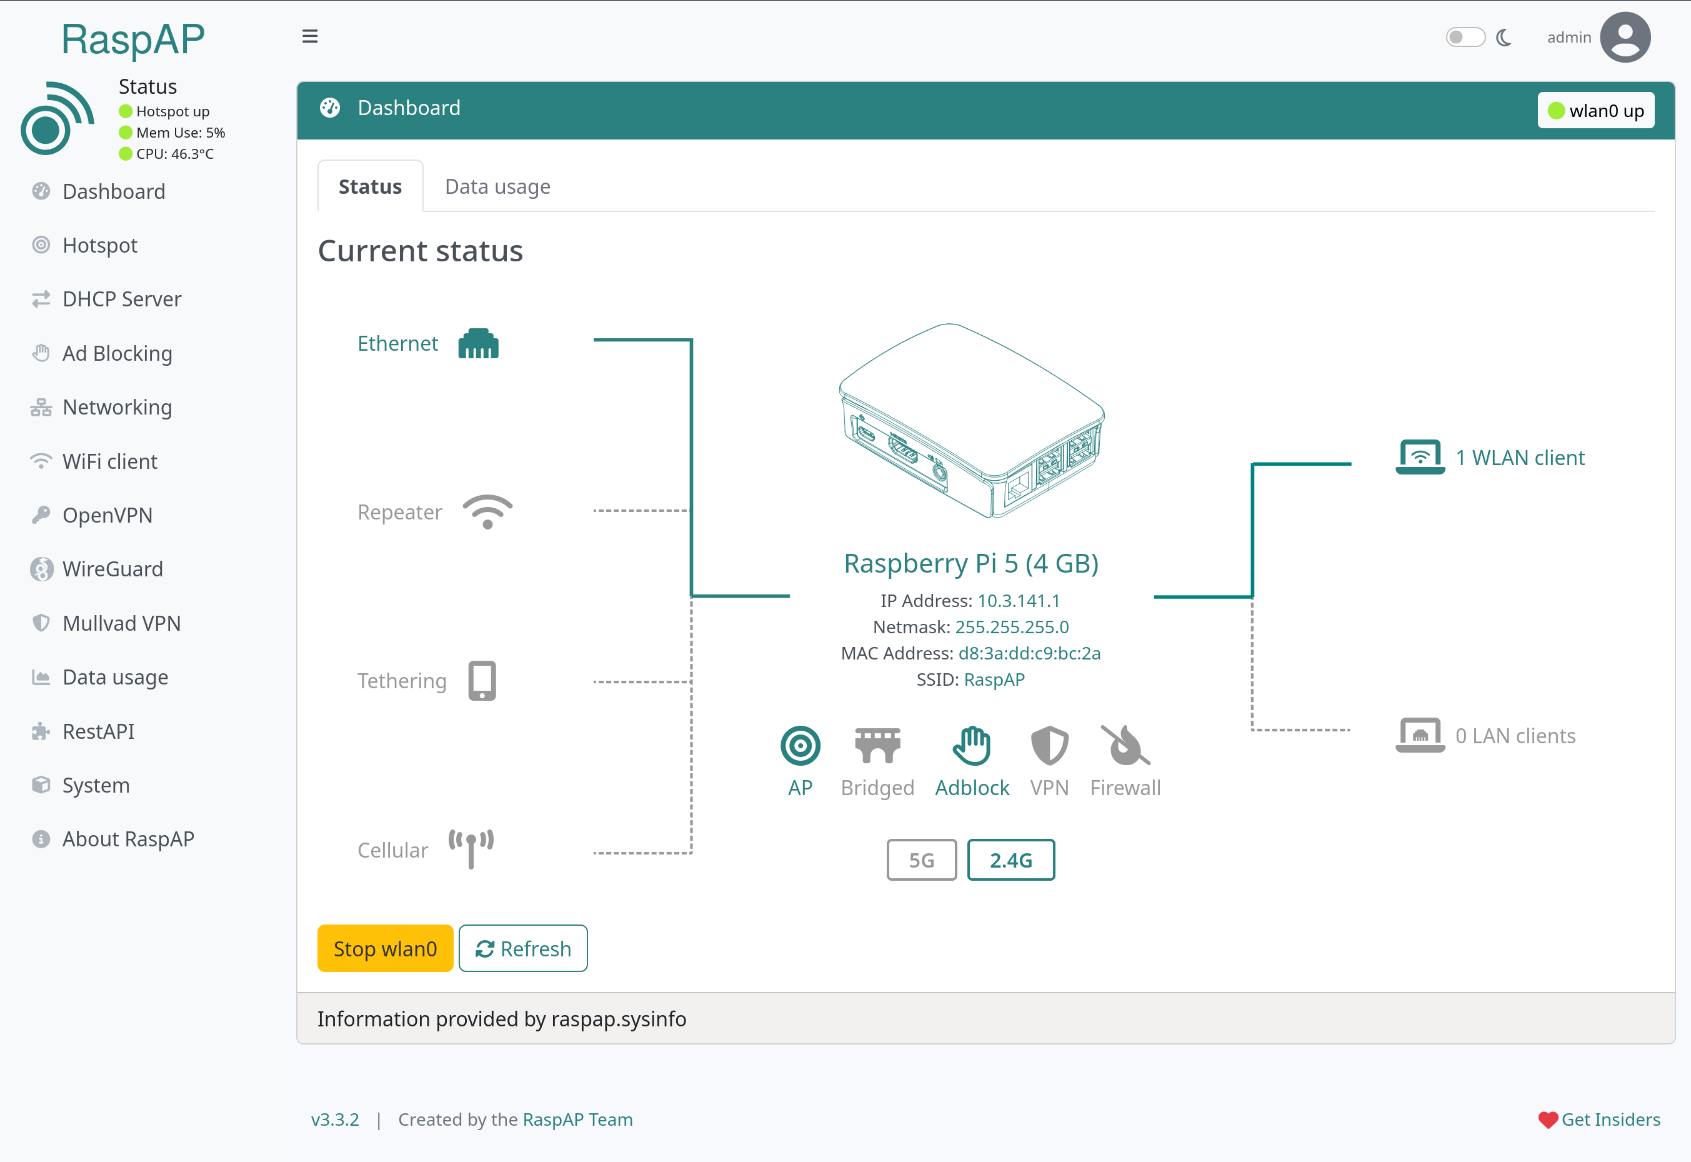 There are a tone of useful and interesting settings and menus here so take your time to look through them all.
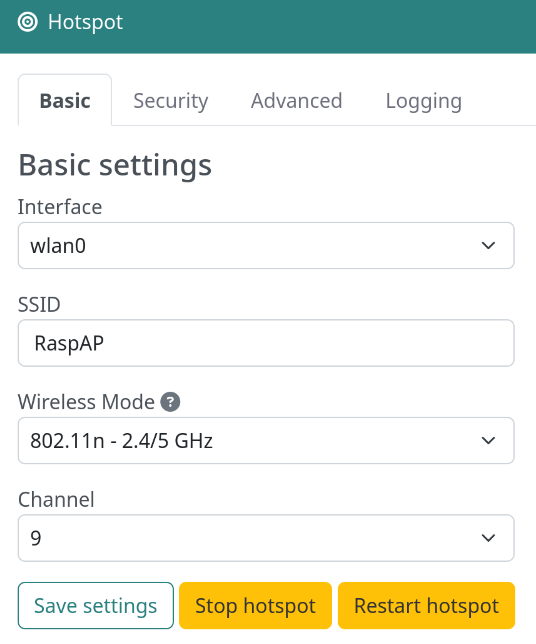
Recommended setting changes
Ensure that default passwords have been changed!
Firstly I recommend that you switch the wireless mode to 802.11n and set the channel to the least congested one if possible:
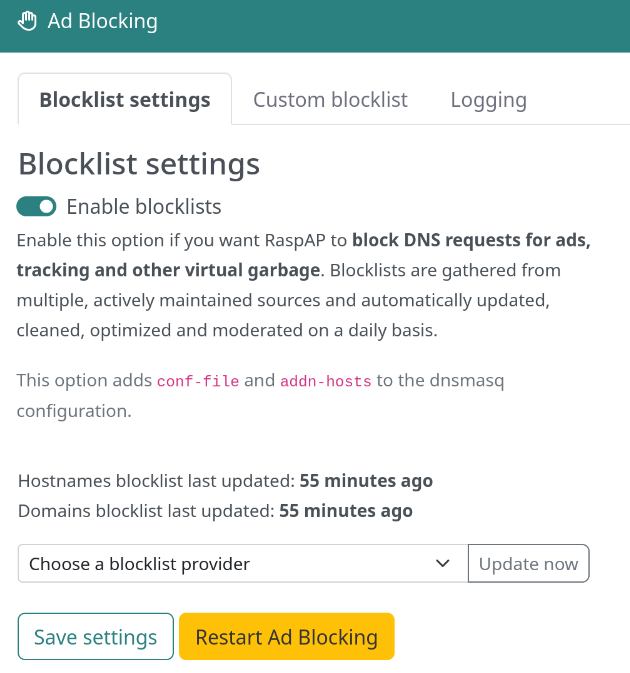
I won’t be going into to detail about network wide ad block in this blog however I do recommend you ensure StevenBlack’s block list is on to help reduce ads and tracking:
Configuring VPN (Mullvad)
You can configure VPNs in a few ways with RaspAP, It supports both Openvpn and Wireguard configs meaning that any VPN provider that allows you to get a VPN config is compatible (a vast majority).
RaspAP also has a few VPNs that are supported through the GUI (you can select them during the install script) and do not require using VPN profiles, they do require a tiny bit of CLI usage to install and login to them (reboot after doing this). AS OF V3.3.2 DO NOT USE THIS FEATURE WITH MULLVAD VPN, IT WILL MAKE THE PI INACCESSIBLE IF YOU DO NOT HAVE A WAY TO GET VIDEO OUT FROM IT
As the Mullvad webgui method is not working as of now, I will be configuring a Wireguard config for Mullvad as Wireguard offers better performance than OpenVPN.
To create a Wireguard config with Mullvad you’ll need to go to this page, make sure to select Linux as the platform and set your exit location to the nearest area to you to reduce latency. You can also select content blocks here if you desire.
Then open the Wireguard tab in the web gui and chose “Upload a file” to upload the Wireguard configuration you just created/downloaded and also enable “Apply iptables rules for AP interface” so that we can forward network traffic from the Wireguard interface to clients connected wirelessly:
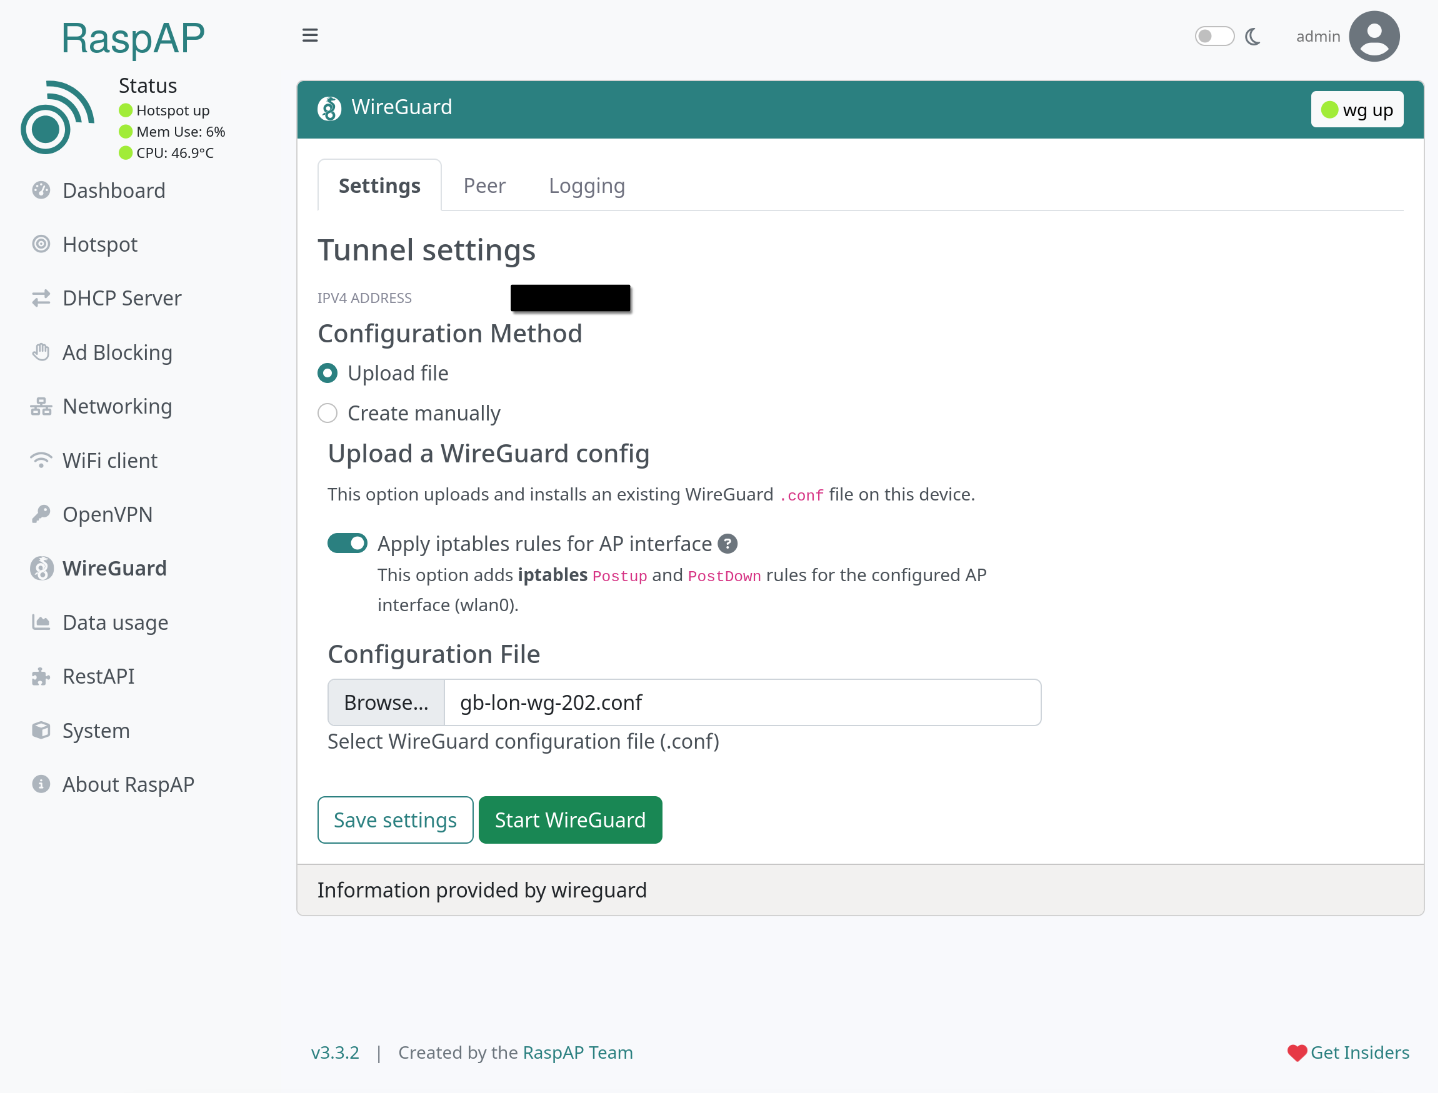 Then save the settings and start wireguard.
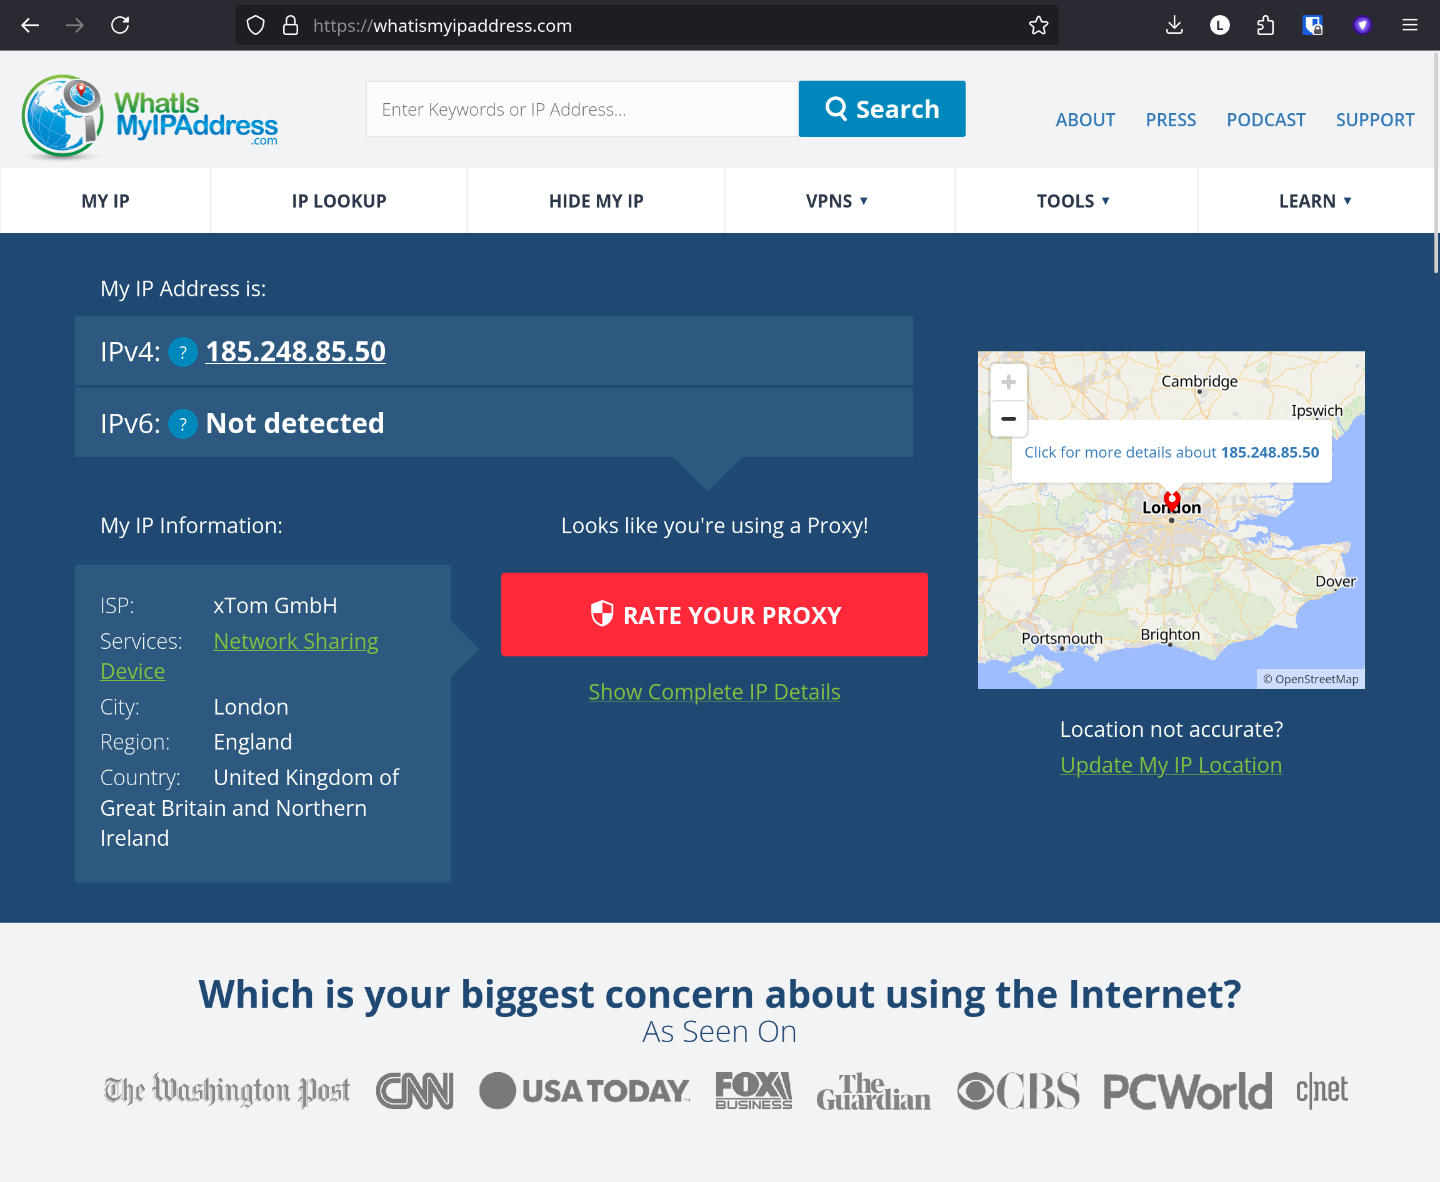
To ensure the changes have been applied go to whatismyipaddress.com and make sure it matches the VPNs servers IP:
Then save the settings and start wireguard.
To ensure the changes have been applied go to whatismyipaddress.com and make sure it matches the VPNs servers IP:
Physical setup
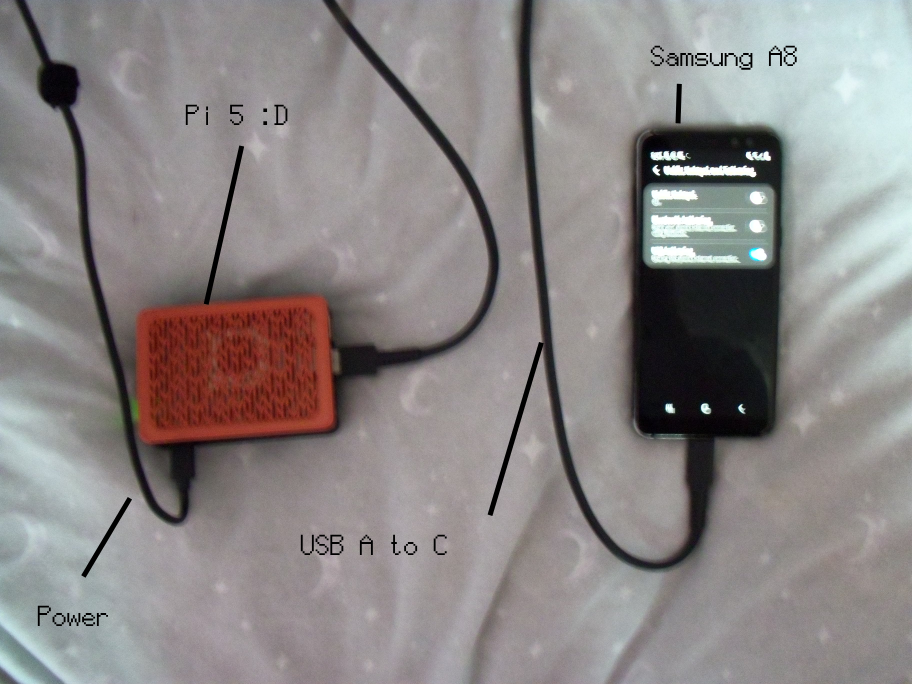 The physical setup for this is relatively straight forward, make sure to enable USB tethering and mobile data on the phone.
Connection Tests
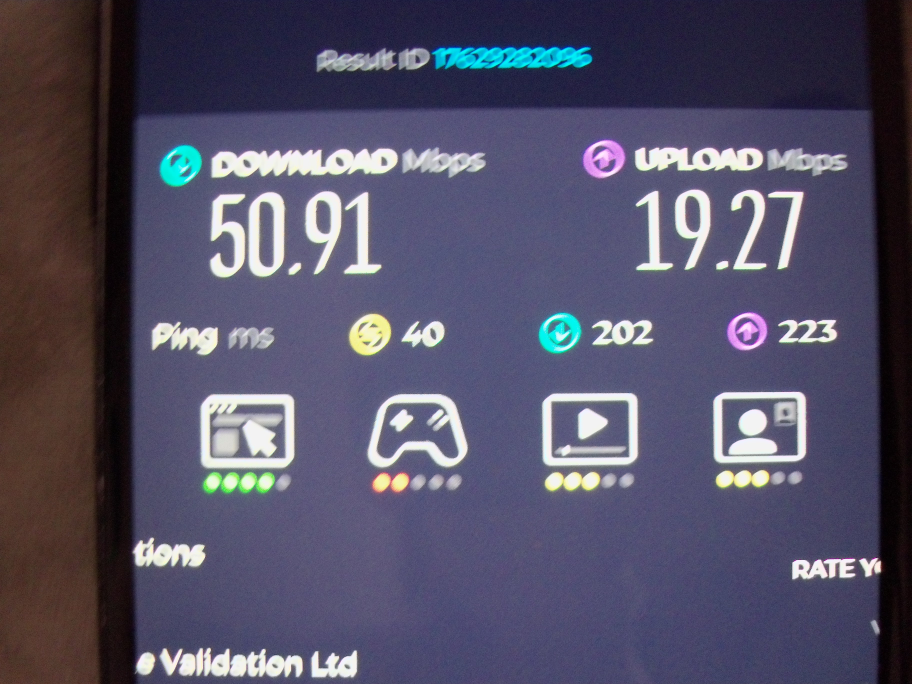
Base line Speed test
In my area using the Samsung a8 within my bedroom this is the average speed I get:
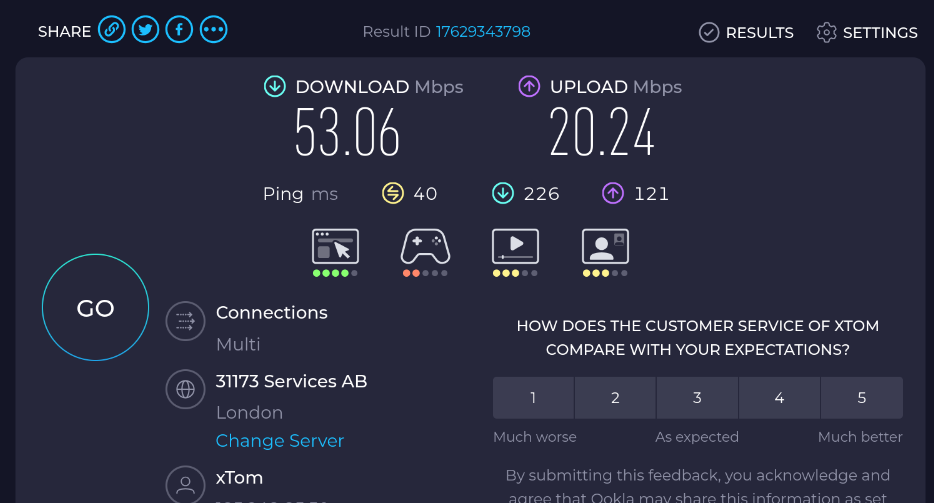
End device speed tests over Pi’s onboard Wi-Fi
Upstairs average speed:
 Downstairs average speed:
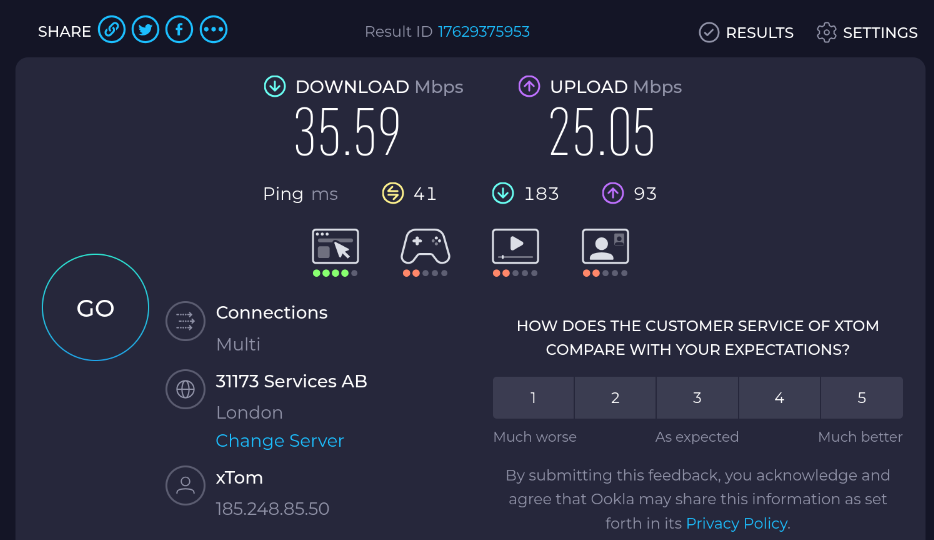 As you can see even with the VPN and the Pi5s built in Wi-Fi we are able to get pretty usable speeds, the latency is even low and consistent enough for online gaming which I wasn’t quite expecting :D
Improving the Speeds
While the Pi’s onboard Wi-Fi was sufficient for my data speeds and house size, I was unable to get it to go above 60mbps (when connected to my current gigabit connection) meaning that for people with higher data speeds (like my friend who gets 150+) it would cause a massive bottle neck.
There are a couple ways we can improve this:
- Buy a quality Wi-Fi dongle that has support with Pi OS.
- Use a pi hat like this, which allows for much better Wi-Fi cards to be installed into the pi.
- Use a dedicated Access Point or Router in “AP mode” connected to the Pi via Ethernet.
Also its worth mentioning that cellular speeds can be increased substantially by mounting a cellular antenna and pointing it at the nearest cell tower.
Final thoughts
This project is not for everyone however it could be for you! Personally compared to dealing with the issues I’ve had with ISPs in the past, not to mention the pricing being better and giving me more speed than my last contract with an ISP, this is a much more desirable option :D
Ending rambles
holy moly :0 you made it to the end! This has been a fun little 2 day project to make, I’ve had the idea for this for quite a while but never had an opportunity to make it :3 If you make a setup like this yourself please send it to me on discord (naomi.the.ashen.one), id love to add a picture of it at the bottom of this post :D
If you have any questions contact me via discord ^-^
Anyways stay tuned for “I h8 the british government - And I have the solution!” X3